Understanding and Using the Pipeline
The SendSquared Pipeline provides a visual kanban-style board to track leads through your sales process. This guide explains how to use the pipeline effectively to manage your opportunities.
Accessing the Pipeline
To access the pipeline view:
- Navigate to Sales in the main menu
- Select Pipeline from the submenu
- The pipeline view will load with your current leads organized by status
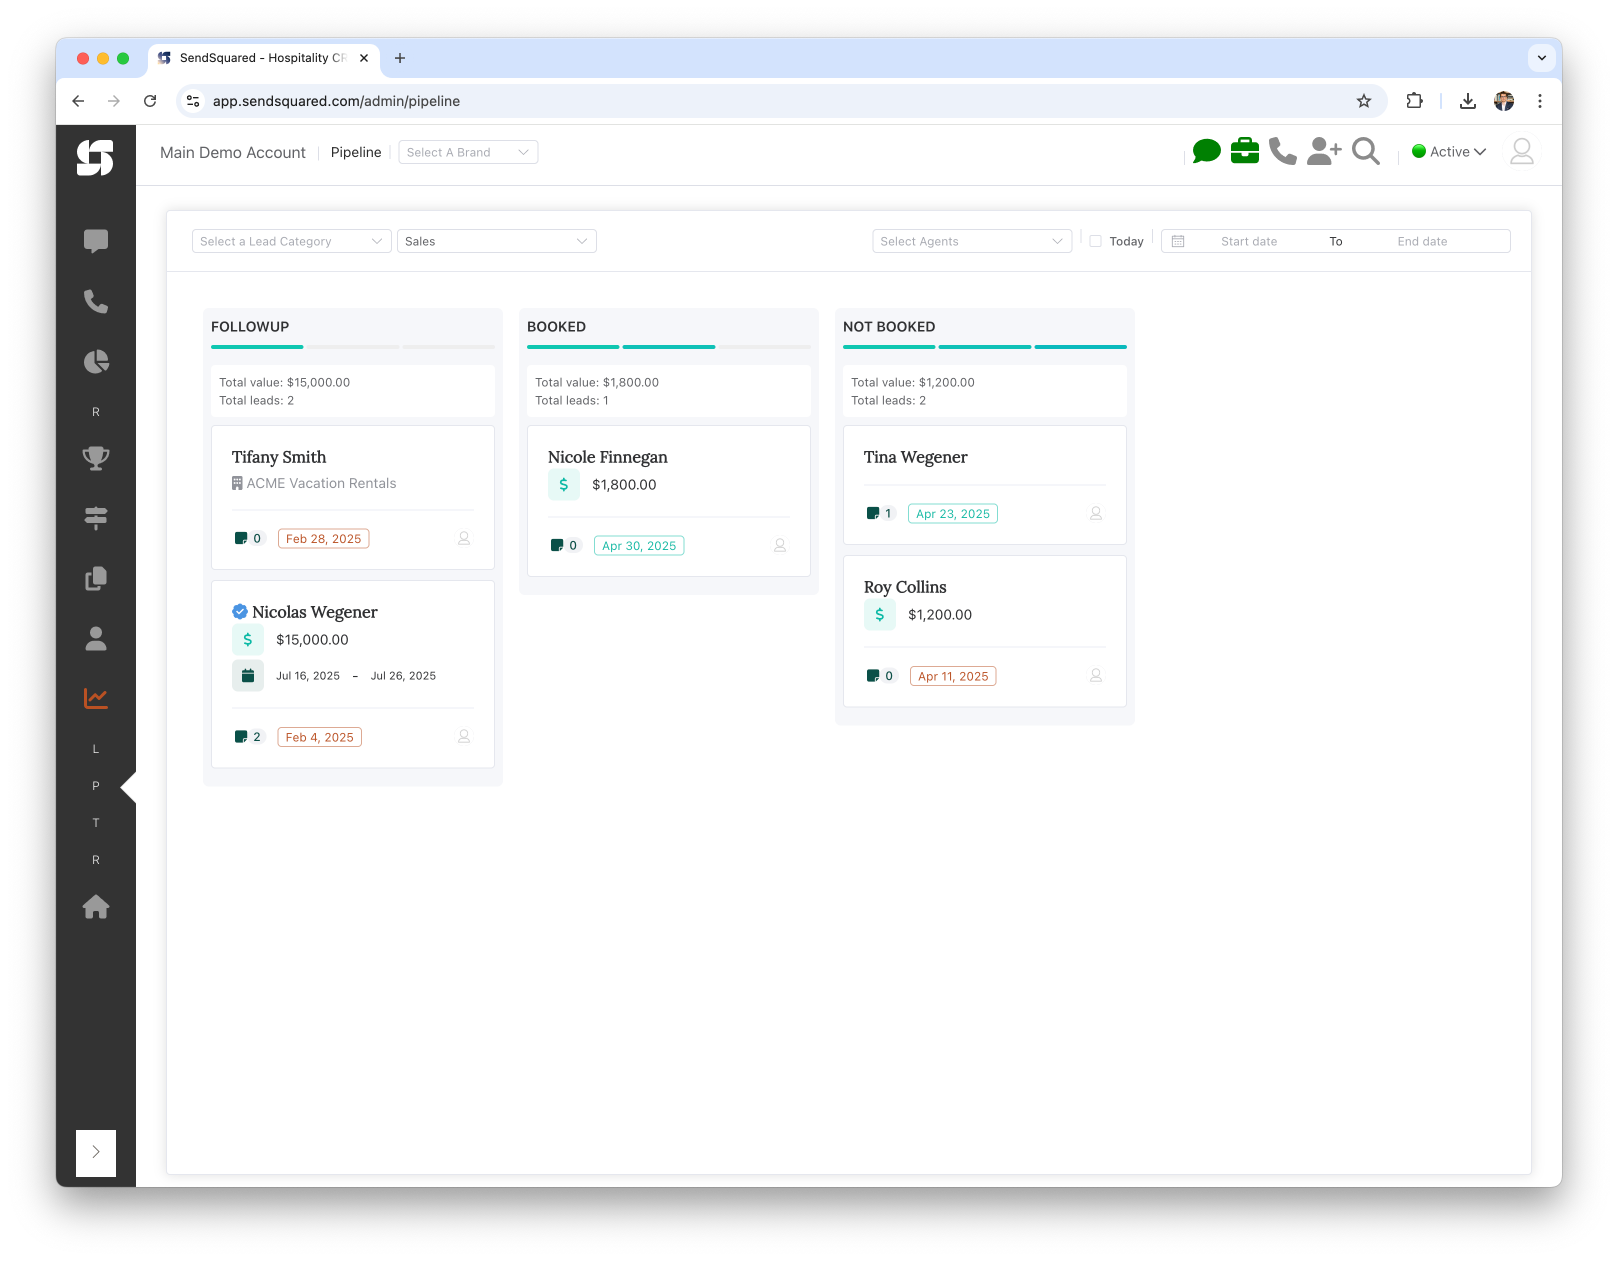
Pipeline Interface Overview
The pipeline interface consists of several key elements:
Filtering and Navigation
At the top of the screen, you'll find filtering options:
- Select a Lead Category: Filter by lead category
- Select a Lead Type: Filter by lead type (e.g., Sales)
- Select Agents: Filter by assigned agent
- Date Filters: Filter by date range
Status Columns
The main board consists of columns representing each lead status:
- Each column represents a status in your lead workflow
- Status columns are arranged from left to right in the order you defined
- Examples include: New Lead, Discovery Meeting Scheduled, Discovery Meeting Completed, etc.
Lead Cards
Within each column, you'll see cards representing individual leads:
- Each card shows key information about the lead
- Cards can be dragged between columns to update their status
Understanding Lead Cards
Each lead card in the pipeline displays important information at a glance:
Card Elements
- Lead Name: The name of the primary contact
- Company/Property: The associated organization or property
- Value: The estimated value of the opportunity
- Follow-up Date: When the next follow-up is scheduled
- Assigned Agent: Icon indicating who owns the lead
- Comments/Notes: Indicator showing if there are notes attached
- Additional Fields: Custom fields may appear depending on your setup
Card Actions
Hovering over a card reveals additional actions:
- Quick Edit: Make changes without opening the full lead record
- View Details: Open the complete lead record
- Add Note: Quickly add a note to the lead
- Schedule Follow-up: Set or update the follow-up date
Working with the Pipeline
Moving Leads Through Stages
To update a lead's status:
- Locate the lead card in its current status column
- Click and drag the card to the appropriate new status column
- Release to drop the card in the new column
- The lead status will automatically update in the system
This drag-and-drop functionality makes it easy to visually track a lead's progress through your sales process.
Column Summaries
At the top of each status column, you'll see summary information:
- Total Value: The combined value of all leads in that status
- Total Leads: The number of leads in that status
This gives you a quick overview of your pipeline health and distribution.
Sorting and Organizing
Leads within each column can be organized:
- By default, leads are sorted by follow-up date
- You can manually arrange leads by dragging them up or down within a column
- Prioritize your most important leads by moving them to the top
Filtering the Pipeline
The pipeline view can be filtered to focus on specific segments:
Lead Category and Type Filters
- Use the Select a Lead Category dropdown to filter by category
- Use the Select a Lead Type dropdown to focus on specific types
- The pipeline will update to show only leads matching your criteria
Agent Filters
- Click the Select Agents dropdown
- Choose one or more agents to filter by
- The pipeline will display only leads assigned to the selected agents
Date Filters
- Use the date range selectors to filter by:
- Today (quick filter)
- Start date to End date (custom range)
- The pipeline will show leads with follow-up dates in the selected range
Pipeline Best Practices
Regular Pipeline Reviews
- Schedule weekly pipeline reviews with your team
- Discuss leads that haven't moved to the next stage
- Identify bottlenecks in your sales process
- Ensure all team members are updating lead statuses promptly
Lead Prioritization
- Focus on high-value leads first
- Pay special attention to leads with upcoming follow-up dates
- Identify and address stalled leads (those that haven't moved stages in a while)
- Create a system for visual indicators (e.g., color coding for priority)
Pipeline Management
- Regularly clean up your pipeline by updating or archiving old leads
- Set realistic follow-up dates to maintain an actionable pipeline
- Use the summary values to track your pipeline health over time
- Adjust your lead statuses if certain stages are consistently skipped or too crowded
Example Pipeline Workflow
Here's an example of how leads might flow through your pipeline:
- New Lead: A new opportunity enters the pipeline
- Discovery Meeting Scheduled: Initial consultation is set up
- Discovery Meeting Completed: First meeting has occurred
- Full Demo Scheduled: Product/service demonstration is planned
- Proposal Sent: Formal offer has been provided
- Ownership: Final negotiations and closing
This workflow can be customized to match your specific sales process.
Next Steps
After becoming familiar with the pipeline view, explore these related features: